DIY Hand & Nail Masks for Softer Hands This Winter
DIY hand and nail masks for softer hands this winter? Yes, please! Winter’s harsh winds and frigid temperatures wreak havoc on our hands and nails, leaving them dry, cracked, and generally unhappy. But fear not, fellow beauty enthusiasts! This winter, ditch the expensive lotions and embrace the power of natural ingredients to create your own nourishing hand and nail masks.
We’ll explore simple, effective recipes using readily available ingredients, transforming your dry, winter-worn hands into soft, healthy havens.
This post dives deep into the world of DIY hand and nail care, focusing on natural remedies to combat common winter woes. We’ll uncover the amazing benefits of ingredients like honey, olive oil, and avocado, and guide you through creating three unique hand masks and two nail masks, each tailored to specific needs. Get ready to pamper your hands and nails with these easy-to-follow recipes and rediscover the joy of soft, healthy skin and strong, vibrant nails all winter long!
DIY Hand and Nail Masks for Softer Hands This Winter
Source: com.au
Winter’s harsh winds and dry indoor heating can wreak havoc on our hands, leaving them feeling rough, cracked, and generally unpleasant. But before you resign yourself to perpetually chapped skin, consider the power of DIY hand and nail masks! These simple, natural remedies can restore your hands’ softness and suppleness, leaving them feeling pampered and healthy throughout the coldest months.Winter weather significantly impacts our skin’s health.
The cold, dry air draws moisture from our skin, leading to dryness, cracking, and even painful fissures. Our nails can also become brittle and prone to breakage, losing their natural shine and luster. These issues are exacerbated by frequent handwashing, which is essential for hygiene but can further strip away essential oils.
Advantages of Natural Ingredients over Commercial Products
Natural ingredients offer several advantages over commercially produced hand and nail creams and masks. Many commercial products contain harsh chemicals, fragrances, and preservatives that can irritate sensitive skin and exacerbate existing dryness. Natural alternatives, on the other hand, are typically gentler and more nourishing. They often contain beneficial vitamins, antioxidants, and emollients that promote healing and improve skin elasticity.
For example, ingredients like honey, olive oil, and aloe vera are known for their moisturizing and soothing properties, while ingredients like avocado and shea butter provide rich emollients to repair damaged skin. By choosing natural ingredients, you can create a customized mask that perfectly suits your skin’s specific needs, avoiding potential reactions to unknown chemicals. Furthermore, making your own masks is often more economical than regularly purchasing commercial products.
Ingredient Spotlight
This winter, our hands and nails take a beating from the cold, dry air. To combat this, we’ll delve into the power of nature’s pantry, exploring five amazing ingredients that can rejuvenate even the most parched skin and brittle nails. These natural remedies offer gentle yet effective solutions for achieving softer, healthier hands. Let’s discover how these ingredients work their magic!
Natural Ingredient Comparison, Diy hand and nail masks for softer hands this winter
The following table compares five natural ingredients commonly used in DIY hand and nail masks, highlighting their benefits, application methods, and potential side effects. Remember to always perform a patch test on a small area of skin before applying any new ingredient to your entire hands.
| Ingredient | Benefits | Application Method | Potential Skin Reactions |
|---|---|---|---|
| Honey | Moisturizes, soothes inflammation, possesses antibacterial properties. | Apply directly to hands and nails, or mix with other ingredients in a mask. | Rarely causes reactions, but some individuals may experience mild irritation. |
| Olive Oil | Deeply moisturizes, rich in antioxidants, softens cuticles. | Massage into hands and nails, or use as a base for a hand mask. | Generally well-tolerated, but can clog pores for some individuals. |
| Avocado | Rich in vitamins A, D, and E, deeply hydrates, improves skin elasticity. | Mash ripe avocado and apply directly or mix with other ingredients. | Rarely causes reactions, but those with avocado allergies should avoid. |
| Oatmeal | Soothes irritation, gently exfoliates, helps to retain moisture. | Grind into a fine powder and mix with water or other ingredients to form a paste. | Generally very well-tolerated, suitable for sensitive skin. |
| Aloe Vera | Soothes inflammation, promotes healing, hydrates and softens skin. | Apply fresh gel directly from the leaf or use commercially available aloe vera gel. | Rarely causes reactions, but some individuals may experience mild irritation. |
Moisturizing and Healing Properties
Each ingredient offers unique benefits for dry, damaged hands and nails. Honey’s humectant properties attract and retain moisture, while its antibacterial properties help prevent infection. Olive oil’s fatty acids penetrate deeply, nourishing and softening the skin. Avocado’s vitamins and healthy fats provide intense hydration and improve skin elasticity. Oatmeal’s soothing properties calm irritated skin, while its gentle exfoliation removes dead skin cells.
Finally, aloe vera’s potent anti-inflammatory and healing properties soothe dryness and promote cell regeneration.
Sourcing and Preparation
Sourcing these ingredients is often straightforward. Honey can be purchased from local farmers’ markets or health food stores, opting for raw, unfiltered honey for maximum benefits. Olive oil should be extra virgin for its high quality. Ripe avocados are readily available in most grocery stores. Oatmeal can be easily purchased and ground using a blender or food processor.
For aloe vera, you can either purchase the gel or, if you have an aloe vera plant, carefully extract the gel from a leaf. Remember to always wash your hands thoroughly before handling any ingredients and ensure that any tools you use are clean.
DIY Hand Mask Recipes
Winter’s harsh conditions can leave our hands feeling dry and cracked. Luckily, creating nourishing hand masks at home is easy and affordable! These recipes use readily available ingredients to target different levels of dryness and sensitivity, helping you achieve softer, healthier hands.
Hand Mask for Mild Dryness
This recipe is perfect for those experiencing mild dryness or simply wanting a gentle, hydrating treatment. It focuses on moisturizing and protecting the skin’s natural barrier.
- Ingredients: 1 ripe avocado, 1 tablespoon honey, 1 tablespoon olive oil.
- Instructions:
- Mash the avocado until smooth.
- Mix in the honey and olive oil until a creamy paste forms.
- Apply the mixture evenly to your hands and fingers, ensuring complete coverage.
- Wear cotton gloves for at least 15 minutes (or longer for more intense hydration).
- Rinse thoroughly with lukewarm water and pat your hands dry.
Hand Mask for Severe Dryness and Cracking
If your hands are severely dry, cracked, or chapped, this richer recipe provides intense hydration and repair. The addition of oatmeal offers soothing properties for irritated skin.
- Ingredients: 2 tablespoons rolled oats (finely ground), 1 tablespoon plain yogurt, 1 tablespoon coconut oil, ½ teaspoon honey.
- Instructions:
- Combine the ground oats, yogurt, coconut oil, and honey in a small bowl.
- Mix thoroughly until a paste-like consistency is achieved.
- Apply the mask generously to your hands and fingers, paying special attention to dry or cracked areas.
- Put on cotton gloves and leave the mask on for at least 30 minutes, or even overnight for maximum benefit.
- Rinse with lukewarm water and gently pat your hands dry. Follow with a rich hand cream.
Hand Mask for Sensitive Skin
This gentle recipe is ideal for those with sensitive skin prone to irritation. It uses calming ingredients to soothe and hydrate without causing further discomfort.
- Ingredients: 2 tablespoons aloe vera gel, 1 tablespoon chamomile tea (cooled), 1 teaspoon jojoba oil.
- Instructions:
- In a small bowl, combine the aloe vera gel, cooled chamomile tea, and jojoba oil.
- Mix well until a smooth mixture is formed.
- Apply the mask evenly to your hands and fingers.
- Leave on for 15-20 minutes. Avoid prolonged contact if any irritation occurs.
- Rinse thoroughly with lukewarm water and gently pat dry. Avoid harsh scrubbing.
DIY Nail Mask Recipes
Winter’s harsh conditions can leave our nails brittle and dry, just like our skin. But with a little DIY magic, we can restore their strength and shine. These two nail mask recipes are designed to deeply nourish and strengthen your nails, leaving them healthy and beautiful. Remember to always perform a patch test before applying any new product to your entire nail bed.
Strengthening Nail Mask with Olive Oil and Lemon
This mask combines the moisturizing power of olive oil with the strengthening properties of lemon juice. Olive oil is rich in antioxidants and fatty acids that help hydrate and protect the nails, while lemon juice contains vitamin C, known for its ability to strengthen and brighten nails.The application process is simple. First, gently clean your nails to remove any dirt or polish.
Next, combine one tablespoon of extra virgin olive oil with half a tablespoon of freshly squeezed lemon juice in a small bowl. Using a cotton ball or a small brush, apply the mixture generously to each nail and cuticle. Ensure thorough coverage. Leave the mask on for 15-20 minutes. Afterward, gently rinse your nails with warm water and pat them dry.
Finish by applying a cuticle oil for extra hydration. For best results, repeat this treatment once or twice a week.
Hydrating Nail Mask with Avocado and Honey
This deeply hydrating mask uses the richness of avocado and the humectant properties of honey to combat dryness and brittleness. Avocado is packed with vitamins and healthy fats that nourish and moisturize the nails, while honey acts as a natural humectant, drawing moisture into the nails and keeping them hydrated.To prepare this mask, mash half an avocado until smooth. Add one teaspoon of honey and mix well to create a creamy paste.
Apply the mixture evenly to your nails and cuticles, ensuring complete coverage. Allow the mask to sit for 15-20 minutes. Then, gently rinse your nails with lukewarm water and pat them dry. Following the rinse, apply a cuticle oil to seal in moisture and promote healthy nail growth. Use this hydrating mask once a week for optimal results.
Applying Cuticle Oil
After applying either nail mask, applying cuticle oil is crucial for sealing in moisture and promoting healthy nail growth. Take a small amount of cuticle oil onto your fingertip and gently massage it into the cuticles and the base of your nails using circular motions. This helps to soften the cuticles, prevent hangnails, and nourish the nail matrix (the area where nail growth originates).
The massage also stimulates blood circulation, promoting healthy nail growth. Allow the cuticle oil to absorb completely before applying any nail polish. Look for cuticle oils containing ingredients like jojoba oil, vitamin E, or almond oil for optimal benefits. A rich, moisturizing cuticle oil will help keep your nails hydrated and healthy throughout the winter months.
Application Techniques and Aftercare: Diy Hand And Nail Masks For Softer Hands This Winter
Source: stackumbrella.com
Winter’s harsh weather can really dry out your hands, so I’ve been loving DIY hand and nail masks lately! It’s all about self-care, right? But amidst pampering myself, I also remember it’s crucial to be mindful of my health; understanding things like the risk factors that make stroke more dangerous is just as important as keeping my hands soft.
So, after my moisturizing mask, I’ll be sure to check my blood pressure – a little self-care goes a long way!
Getting the most out of your DIY hand and nail masks involves more than just mixing the ingredients. Proper application and subsequent care are crucial for achieving soft, healthy hands and nails, especially during the harsh winter months. Following these steps will maximize the benefits of your homemade treatments.The optimal duration for leaving a hand or nail mask on depends on the specific ingredients used.
Generally, a time frame of 15-20 minutes is a good starting point for most recipes. However, some masks containing potent ingredients like honey or essential oils might benefit from a shorter application time (10-15 minutes) to prevent potential irritation. Always perform a patch test on a small area of skin before applying the mask to your entire hands and nails to check for any allergic reactions.
If you experience any burning or discomfort, remove the mask immediately and rinse thoroughly.
Optimal Mask Application Time and Removal
Leaving a mask on for too long can sometimes lead to dryness or irritation, while too short a time may not allow the ingredients to fully penetrate the skin and nails. For example, a clay-based hand mask might feel tight and dry if left on for longer than 20 minutes. Conversely, a hydrating mask with ingredients like aloe vera might not provide its full moisturizing benefits if removed too quickly.
Carefully observe your skin’s reaction to determine the best duration for your specific mask. Once the time is up, gently remove the mask using lukewarm water and a soft cloth. Avoid harsh scrubbing, which can irritate the skin.
Importance of Post-Mask Hand Washing and Moisturizing
After removing the mask, it’s essential to wash your hands thoroughly with lukewarm water and a gentle cleanser. This step removes any residual mask ingredients and cleanses the skin, preparing it for the next step. Avoid using harsh soaps or hot water, as these can strip the skin of its natural oils, leading to dryness and irritation. Following the cleansing step, generously apply a moisturizer to lock in hydration and protect your skin.
Choose a moisturizer that suits your skin type and complements the ingredients used in your mask. For instance, if your mask contained ingredients known for their exfoliating properties, a richer, more emollient moisturizer might be beneficial.
Incorporating DIY Masks into a Winter Skincare Routine
To maximize the benefits of these DIY masks, consider incorporating them into a regular winter skincare routine. Aim for 1-2 applications per week, depending on your skin’s needs. For instance, if you have very dry hands, you might benefit from using a hydrating hand mask twice a week. If your hands are generally well-hydrated, once a week might suffice.
Remember that consistency is key. By incorporating these masks into your regular routine, you can help maintain soft, healthy hands and nails throughout the winter months. Remember to also protect your hands from harsh weather conditions by wearing gloves when outdoors. This preventative measure, combined with regular mask treatments, will significantly improve the overall health and appearance of your hands.
Troubleshooting Common Issues
DIY hand and nail masks, while wonderfully nourishing, can sometimes present unexpected challenges. Understanding potential problems and knowing how to address them is key to achieving soft, healthy hands and nails. This section will cover common issues and offer solutions to help you avoid unpleasant surprises and maximize the benefits of your homemade treatments.
Allergic Reactions
Allergic reactions to ingredients in DIY masks are a possibility, even with natural products. Certain essential oils, for example, are known skin sensitizers. Some individuals may also be sensitive to ingredients like honey, nuts, or certain fruits. A mild reaction might manifest as redness or itching, while a more severe reaction could involve swelling or difficulty breathing.
Winter’s harsh winds can really dry out your hands, so I’ve been experimenting with DIY hand and nail masks lately – oatmeal and honey are my current faves! It’s a good reminder to prioritize self-care, especially considering how easily we can get sick; I was so saddened to hear about Monali Thakur’s hospitalization, reading about it here: monali thakur hospitalised after struggling to breathe how to prevent respiratory diseases , which highlights the importance of staying healthy.
Back to those soft hands though – I’ll share my favorite recipes soon!
Prevention and Treatment of Allergic Reactions
Always perform a patch test before applying any new mask recipe to your entire hands and nails. Apply a small amount of the mixture to a hidden area of skin (like the inside of your elbow) and wait 24-48 hours to observe any reaction. If redness, itching, or swelling occurs, discontinue use immediately. If a reaction develops after a full application, wash the affected area thoroughly with cool water and consider using a mild hydrocortisone cream (after consulting a doctor or pharmacist).
For severe reactions, seek immediate medical attention.
Insufficient Moisture
While the goal is intensely moisturized hands and nails, sometimes a DIY mask might not provide sufficient hydration. This could be due to using ingredients that are not sufficiently moisturizing, or failing to leave the mask on long enough. Using only oil-based ingredients without including humectants, for instance, may lead to insufficient moisture.
Solutions for Insufficient Moisture
Ensure your recipe incorporates a good balance of humectants (ingredients that attract and retain moisture, like glycerin or hyaluronic acid), emollients (ingredients that soften and smooth the skin, like shea butter or coconut oil), and occlusives (ingredients that create a barrier to prevent moisture loss, like beeswax or petroleum jelly). Leaving the mask on for a longer duration (30-60 minutes, covered with gloves) can also improve moisture absorption.
Consider adding a few drops of a hydrating serum or lotion after removing the mask to lock in moisture.
Other Potential Problems and Solutions
Besides allergic reactions and insufficient moisture, other problems can occur. For example, using overly abrasive ingredients could irritate the skin. Using excessively hot water when washing off the mask could strip the skin of its natural oils. In such cases, choosing gentler ingredients and using lukewarm water are crucial. Always prioritize gentle handling of your skin and nails.
If any persistent issues arise, consult a dermatologist for professional advice.
Visual Guide
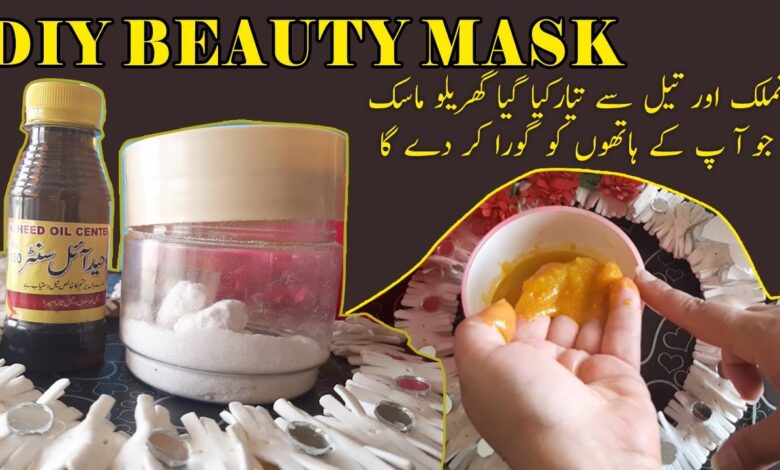
Source: ytimg.com
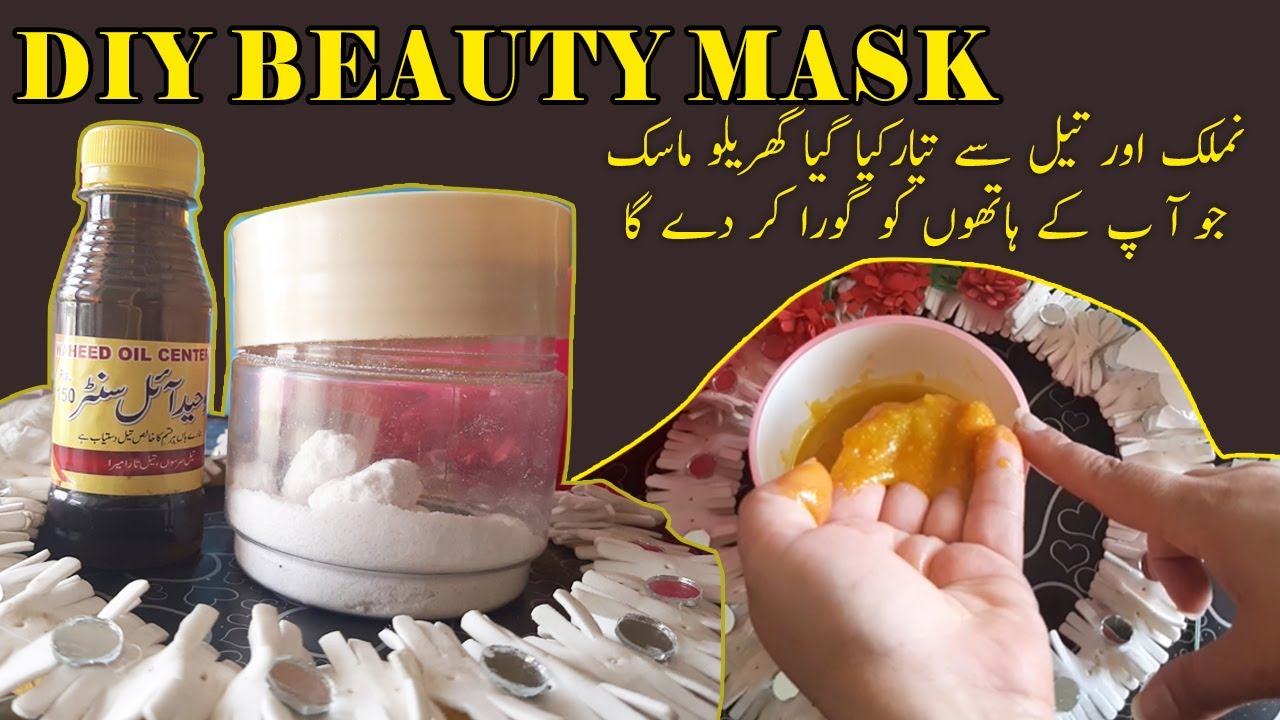
This section provides a visual walkthrough of the DIY hand and nail mask process, detailing the appearance of ingredients in their raw and prepared states, and the observable changes in your hands and nails before, during, and after application. Understanding these visual cues helps you assess the effectiveness of the masks and adjust your routine as needed.Ingredient Appearance and Changes in the Mask
Raw Ingredient Appearance
The visual characteristics of the raw ingredients significantly impact the final mask’s appearance. For example, honey, in its raw form, is a viscous, golden-amber liquid with a slightly sticky texture. Olive oil appears as a clear to pale yellow, oily liquid with a smooth consistency. Oatmeal, before processing, is a light beige to tan granular solid with a somewhat coarse texture.
Lemon juice is a pale yellow, translucent liquid. When combined, these ingredients create a paste-like mask; the honey contributes to its golden hue and stickiness, while the oatmeal provides a slightly grainy texture. The olive oil helps bind the ingredients together, creating a smooth, spreadable consistency. The lemon juice adds a subtle lightening effect to the overall color.
Hand and Nail Appearance Before, During, and After Mask Application
Before mask application, dry, damaged hands and nails might appear dull, rough, and possibly cracked or discolored. The skin may exhibit dryness and flakiness, while nails might be brittle, ridged, or have a pale or yellowed appearance. During application, the mask creates a visible layer on the skin and nails, initially appearing slightly opaque but gradually becoming more translucent as it absorbs.
Winter’s harsh winds really dry out my hands, so I’ve been experimenting with DIY hand and nail masks – oatmeal and honey are my current favorites! It’s amazing how much self-care can improve your mood, which reminds me of something I read recently about strategies to manage Tourette syndrome in children , focusing on coping mechanisms and stress reduction.
Finding ways to manage stress is key for everyone, and pampering your hands with a homemade mask is my little slice of self-care heaven this winter.
After removal, the skin feels noticeably smoother and softer, exhibiting a healthy glow. Nails appear less brittle and may show a subtle improvement in shine and color.
Visual Differences Between Healthy and Damaged Nails and Mask Impact
Healthy nails are typically smooth, uniformly colored (usually a pinkish hue), and have a consistent shine. Damaged nails, however, often appear brittle, ridged, discolored (yellowish, brownish, or even bluish), and may have a dull or uneven surface. They might also exhibit peeling or splitting. The masks, through their moisturizing and nourishing properties, help to improve the overall appearance of damaged nails.
The improved hydration reduces brittleness and promotes a smoother, more even surface. Over time, consistent use can lead to a noticeable reduction in discoloration and an increase in nail shine and strength. For example, a person with brittle nails experiencing vertical ridges might see a reduction in these ridges and a smoother nail surface after consistent use of a strengthening nail mask.
Similarly, yellowing of the nails, often caused by nail polish or underlying health issues, may show improvement in color with regular use of a clarifying nail mask.
Final Review
So, there you have it – a complete guide to achieving softer, healthier hands and nails this winter using the magic of DIY masks! By embracing the natural goodness of readily available ingredients, you can easily create effective and luxurious treatments right in your own kitchen. Remember to always patch test new ingredients before applying them to your entire hands and nails, and don’t hesitate to adjust the recipes to suit your individual needs and preferences.
Happy pampering!
Top FAQs
How often should I use these DIY masks?
For best results, aim for 1-2 times a week. Overuse might not be beneficial.
Can I store leftover mask mixtures?
It’s best to use the masks fresh. Many ingredients don’t store well for extended periods.
What if I have a reaction to one of the ingredients?
Discontinue use immediately and consult a dermatologist if needed. Always do a patch test first!
Are these masks suitable for all skin types?
While generally gentle, some ingredients might not be suitable for all skin types. Always check for potential irritants and do a patch test before full application.
